股票代码:688047
请输入搜索条件
邮箱登录
点击图片刷新
忘记密码
点击图片刷新
09-27 2016

龙芯3A2000上移植NASA WorldWind指南

一、初识NASA WORLDWIND

   NASA World Wind是NASA出品,类似Earthview 3D的鸟瞰工具,更加权威而且完全免费。通过这套程序的3D引擎,可以让你从外太空看见地球上的任何一个角落。
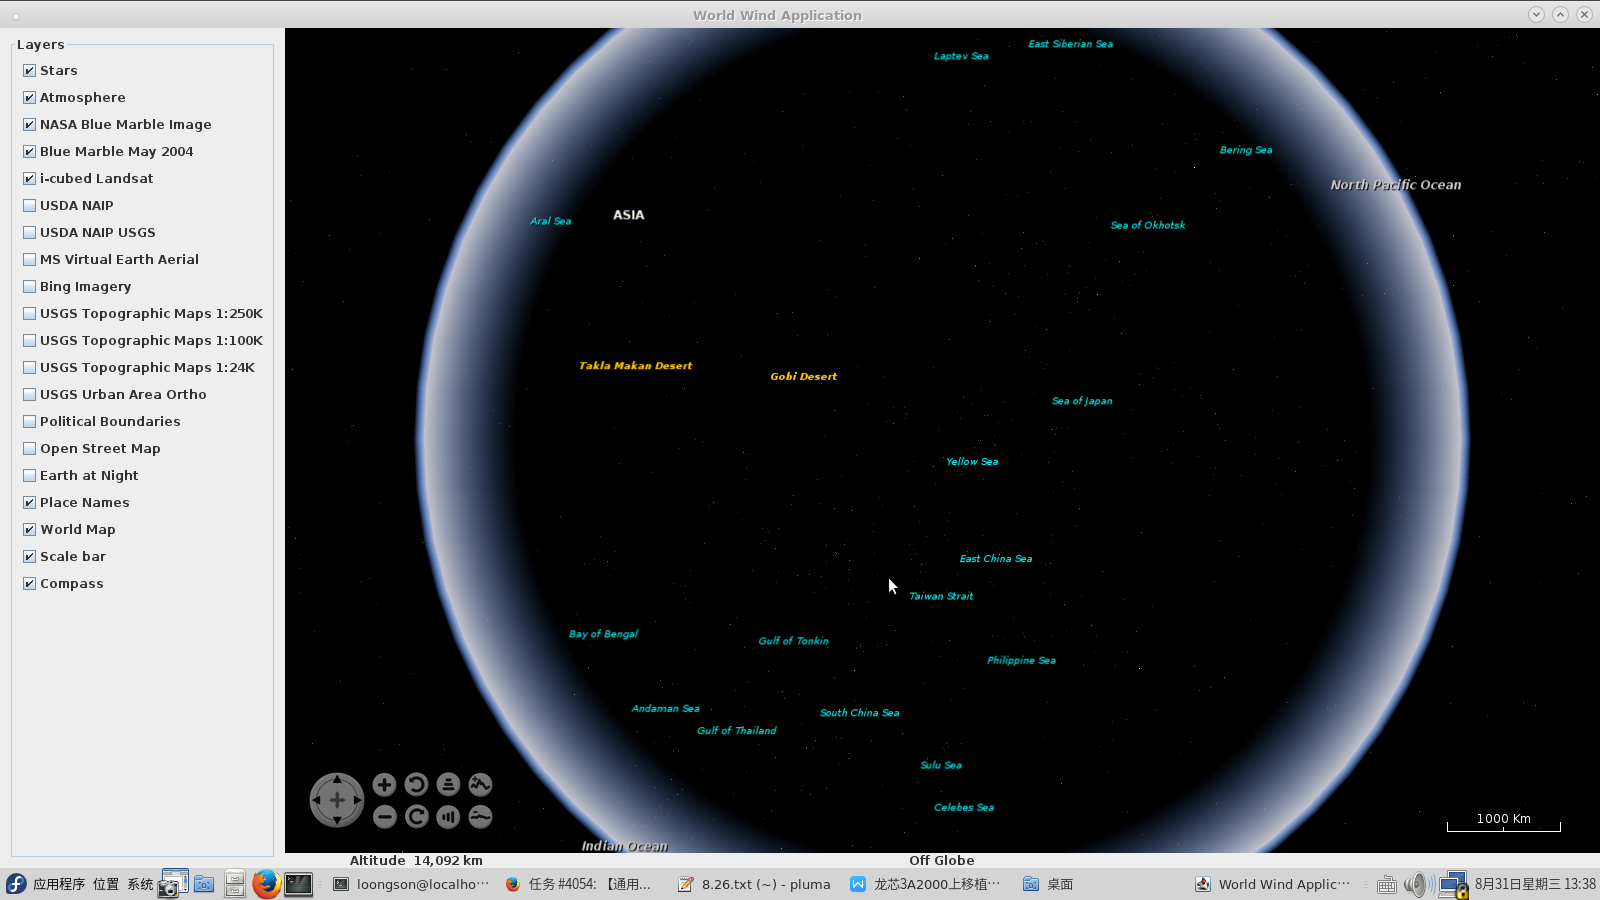
worldwind主界面
    有“天眼”之称的一款软件是否可以在龙芯平台上运行呢?经过修改、调试、编译,笔者终于成功的在龙芯3A2000上运行了worldwind。下面来看看移植过程。
二、下载worldwind以及相关的软件包
首先介绍下和worliwind相关的两外两个软件包gluegen和jogl。
gluegen是自动生成的java和JNI代码,调用C库的工具,可以绑定底层API,如java本地接口(JNI)和 AWT本地接口(jawt)。
jogl是Java对OpenGL绑定的开源项目并设计为采用Java开发的应用程序,还提供了众多3D图形库,如:AWT、Swing和SWT widget,以及自定义窗口工具nativewindow。
为了不让大家走弯路,笔者先简单的介绍下载包的版本。笔者下载的worldwind是2.0.0版本,REDME.txt文档上介绍支持Java SDK1.5.0以上版本。需下载1.5版本的gluegen和jogl包。
● worldwind下载路径:http://ftp.loongnix.org/others/NasaWorldWind/
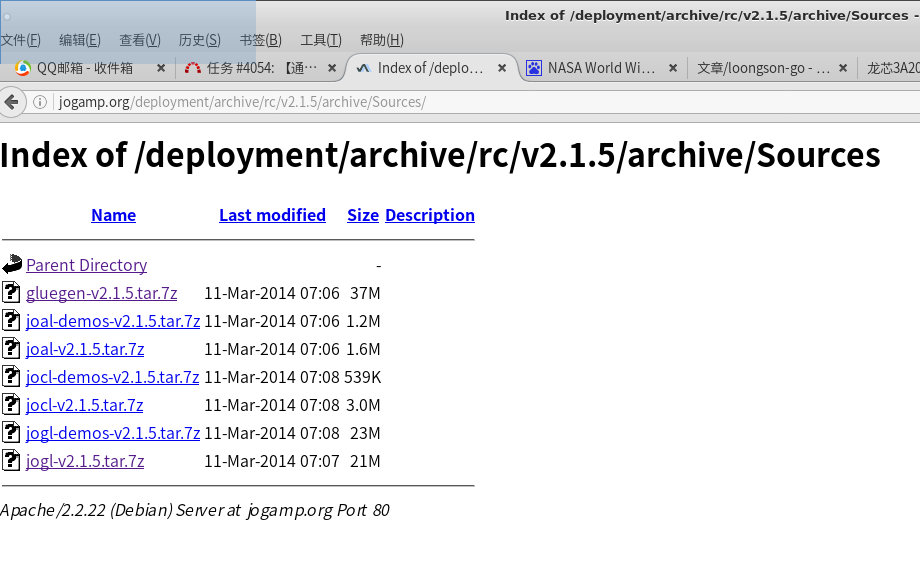
● gluegen和jogl下载路径:http://jogamp.org/deployment/archive/rc/v2.1.5/archive/Sources/
点击gluegen-v2.1.5.tar.7z和jogl-v2.1.5.tar.7z即可下载。
三、编译环境
笔者使用的电脑是龙芯3A2000,系统是Loongnix-Fedora21。
系统下载地址:  http://www.loongnix.org
四、编译源代码
笔者详细的述说这三个软件包里需要修改的地方。
第一步:首先编译gluegen软件包
1.进入gluegen软件包,查找build.xml文件。(记得将解压后的文件名修改为gluegen)
[loongson@localhost gluegen]$find . -name build.xml
./test/TestOneJar_InJar/jogamp01/build.xml
./test/junit/com/jogamp/gluegen/build.xml
./make/build.xml
修改 ./make/build.xml文件,搜索mips,添加如下代码:
在328行添加如下代码:
+  <target name="declare.linux.mips64el" if="isLinuxMips64el">
+      <echo message="Linux.mips64el" />
+     <property name="compiler.cfg.id"                      value="compiler.cfg.linux" />
+    <property name="linker.cfg.id"                        value="linker.cfg.linux.mips64el" />
+  </target>
在360行后面加上代码:
+  declare.linux.mips64el,
2.进入gluegen软件包,查找PlatformPropsImpl.java文件。
[loongson@localhost gluegen]$ find . -name PlatformPropsImpl.java
./src/java/jogamp/common/os/PlatformPropsImpl.java
修改PlatformPropsImpl.java文件,查找mips,在301行添加如下代码:
+ else if( archLower.equals("mips64") ) {        // android  gaoquan
+            return CPUType.MIPS_64;
+        } else if( archLower.equals("mips64el") ) {        // android   gaoquan
+            return CPUType.MIPS_64el;
+        }
3.修改PlatformPropsImpl.java文件。
在./src/java/jogamp/common/os/PlatformPropsImpl.java文件的getOSAndArch()方法下,添加分支,代码如下:
case IA64:
                _os_and_arch = "ia64";
                break;
+            case MIPS_64el:
+                os_and_arch = "mips64el";
+               break;
             case SPARCV9_64:
                _os_and_arch = "sparcv9";
                break;
4.修改MachineDescriptionRuntime.java文件。
在./src/java/jogamp/common/os/MachineDescriptionRuntime.java文件的isCPUArch32Bit()方法下,添加分支,代码如下:
private static boolean isCPUArch32Bit(final Platform.CPUType cpuType) throws RuntimeException {
    switch( cpuType ) {
        case X86_32:
        ...........    
+      case MIPS_64el:
            return false;
5.进入gluegen软件包,查找./make/gluegen-cpptasks-base.xml文件,此文件修改的代码有些多。在gluegen-cpptasks-base.xml中搜索mipsel,在380行添加代码:
在gluegen-cpptasks-base.xml中搜索mipsel,在380行添加代码:
 <condition property="isLinuxMipsel">
      <and>
        <istrue value="${isLinux}" />
        <os arch="mipsel" />
      </and>
    </condition>
+    <condition property="mipsel">
+      <os arch="mipsel" />
+    </condition>
+      <condition property="isLinuxMips64el">
+      <and>
+        <istrue value="${isLinux}" />
+        <os arch="mips64el" />
+      </and>
+    </condition>
+    <condition property="mips64el">
+      <os arch="mips64el" />
+    </condition>
<condition property="isLinuxPpc">
580行添加代码:
<echo message="LinuxMipsel=${isLinuxMipsel}" />
+    <echo message="LinuxMips64el=${isLinuxMips64el}" />
       <echo message="LinuxPpc=${isLinuxPpc}" />
650行添加代码:
 <target name="gluegen.cpptasks.detect.os.linux.mipsel" unless="gluegen.cpptasks.detected.os.2" if="isLinuxMipsel">
    <property name="os.and.arch" value="linux-mipsel" />
  </target>
+  <target name="gluegen.cpptasks.detect.os.linux.mips64el" unless="gluegen.cpptasks.detected.os.2" if="isLinuxMips64el">
+    <property name="os.and.arch" value="linux-mips64el" />
+  </target>
  <target name="gluegen.cpptasks.detect.os.linux.ppc" unless="gluegen.cpptasks.detected.os.2" if="isLinuxPpc">
    <property name="os.and.arch" value="linux-ppc" />
  </target>
682行添加代码
+ gluegen.cpptasks.detect.os.linux.mips64el,
1192行添加代码:
 <linker id="linker.cfg.linux.mipsel" name="${gcc.compat.compiler}">
    </linker>
+   <linker id="linker.cfg.linux.mips64el" name="${gcc.compat.compiler}">
+   </linker>
    <linker id="linker.cfg.linux.ppc" name="${gcc.compat.compiler}">
</linker>
 1413行添加代码:
<target name="gluegen.cpptasks.declare.compiler.linux.mipsel" if="isLinuxMipsel">
      <echo message="Linux.Mipsel" />
      <property name="compiler.cfg.id.base"          value="compiler.cfg.linux" />
      <property name="linker.cfg.id.base"            value="linker.cfg.linux" />
      <property name="java.lib.dir.platform"         value="${java.home.dir}/jre/lib/mipsel" />
    </target>
+    <target name="gluegen.cpptasks.declare.compiler.linux.mips64el" if="isLinuxMips64el">
+      <echo message="Linux.Mips64el" />
+      <property name="compiler.cfg.id.base"          value="compiler.cfg.linux" />
+      <property name="linker.cfg.id.base"            value="linker.cfg.linux" />
+      <property name="java.lib.dir.platform"         value="${java.home.dir}/jre/lib/mips64el" />
+    </target>
    <target name="gluegen.cpptasks.declare.compiler.linux.ppc" if="isLinuxPpc">
      <echo message="Linux.Ppc" />
      <property name="compiler.cfg.id.base"          value="compiler.cfg.linux" />
      <property name="linker.cfg.id.base"            value="linker.cfg.linux" />
      <property name="java.lib.dir.platform"         value="${java.home.dir}/jre/lib/ppc" />
</target>
1449行添加代码:
 + gluegen.cpptasks.declare.compiler.linux.mipsel,
6.在build-test.xml文件中搜索java.build,在164行添加如下代码:
 +   <!--
+   <target name="android.package" depends="java.generate,java.build,native.build" if="isAndroid">
+   -->
+    <target name="android.package" depends="java.generate,native.build" if="isAndroid">
+        <aapt.signed
            assetsdir="resources/assets-test"
7.最后在make目录下,使用ant来编译:
 gluegen.build.check.aapt:
android.package:
developer-src-zip:
      [zip] Building zip: /home/loongson/jogl/gluegen/build/gluegen-java-src.zip
developer-zip-archive:
all:
BUILD SUCCESSFUL
gluegen软件包终于编译成功了!
* 最后记得将build目录下的 .jar 文件拷贝到worldwind下
第二步:编译jogl软件包
1.下载swt.jar文件(http://ftp.loongnix.org/others/NasaWorldWind/),拷贝到swt目录下(jogl-v2.1.5/make/lib/swt/)
2.进入jogl-v2.15软件包,在./make/build-nativewindow.xml文件中进行修改。
  <target name="c.configure.linux.mipsel" if="isLinuxMipsel">
      <echo message="Linux.MIPSEL" />
      <property name="compiler.cfg.id"                      value="compiler.cfg.linux" />
      <property name="linker.cfg.id.oswin"                  value="linker.cfg.linux.nativewindow.x11" />
    </target>
+   <target name="c.configure.linux.mips64el" if="isLinuxMips64el">
+      <echo message="Linux.MIPS64EL" />
+      <property name="compiler.cfg.id"                      value="compiler.cfg.linux" />
+      <property name="linker.cfg.id.oswin"                  value="linker.cfg.linux.nativewindow.x11" />
+    </target>
<target name="c.configure.linux.ppc" if="isLinuxPpc">
    ..........
+   c.configure.linux.mipsel,c.configure.linux.mips64el,c.configure.linux.ppc
  3.修改build-common.xml文件,添加如下代码:
  <condition property="swt.jar" value="${project.root}/make/lib/swt/gtk-linux-x86/swt-debug.jar">
          <istrue value="${isAndroid}" /> <!-- FIXME JAU .. hack -->
        </condition>
+       <condition property="swt.jar" value="${project.root}/make/lib/swt/gtk-linux-mips64el/swt.jar">
+          <istrue value="${isLinuxMips64el}" /> <!-- FIXME JAU .. hack -->
+        </condition>
         <property name="swt-cocoa-macosx-x86_64.jar" value="${project.root}/make/lib/swt/cocoa-macosx-x86_64/swt-debug.jar"/>
  4.修改build-jogl.xml文件,添加如下代码:
 <target name="c.configure.linux.mipsel" if="isLinuxMipsel">
      <echo message="Linux.MIPSEL" />
      <property name="compiler.cfg.id"                     value="compiler.cfg.linux" />
      <property name="linker.cfg.id.os"                    value="linker.cfg.linux.jogl.x11" />
    </target>
+    <target name="c.configure.linux.mips64el" if="isLinuxMipsel">
+      <echo message="Linux.MIPSEL" />
+      <property name="compiler.cfg.id"                     value="compiler.cfg.linux" />
+      <property name="linker.cfg.id.os"                    value="linker.cfg.linux.jogl.x11" />
+    </target>
+   c.configure.linux.mipsel,c.configure.linux.mips64el,c.configure.linux.ppc
5.修改build-newt.xml文件,添加如下代码:
 +    <target name="c.configure.linux.mips64el" if="isLinuxMips64el">
+      <echo message="Linux.mips64el" />
+      <property name="compiler.cfg.id"                      value="compiler.cfg.linux" />
+      <condition property="linker.cfg.id.oswin"             value="linker.cfg.linux.newt.x11"
+                                                            else="linker.cfg.linux">
+          <isset property="isX11" />
+      </condition>
+      <echo message="linker.cfg.id.oswin ${linker.cfg.id.oswin}" />
+    </target>
+    c.configure.linux.mipsel,c.configure.linux.mips64el,c.configure.linux.ppc
6.在make目录下,使用ant来编译:
 all:
BUILD SUCCESSFUL
Total time: 3 minutes 1 second
终于编译成功了!
* 记得将jogl下的jogl-all.jar、nativewindow-natives-linux-mips64el.jar、jogl-all-natives-linux-mips64el.jar,拷贝到worldwind下
第三步:在worldwind下,运行提供的用例。
 [loongson@localhost worldwind-2.0.0]$ chmod +x run-demo.bash
[loongson@localhost worldwind-2.0.0]$ ./run-demo.bash gov.nasa.worldwindx.examples.ApplicationTemplate
最终worldwind终于运行起来了!3A2000下拖动页面基本流畅。
为了能够更流畅的查看地图,可以屏蔽终端的输入:
 [loongson@localhost worldwind-2.0.0]$ ./run-demo.bash gov.nasa.worldwindx.examples.ApplicationTemplate &>/dev/null
 
1000km高空下的地球
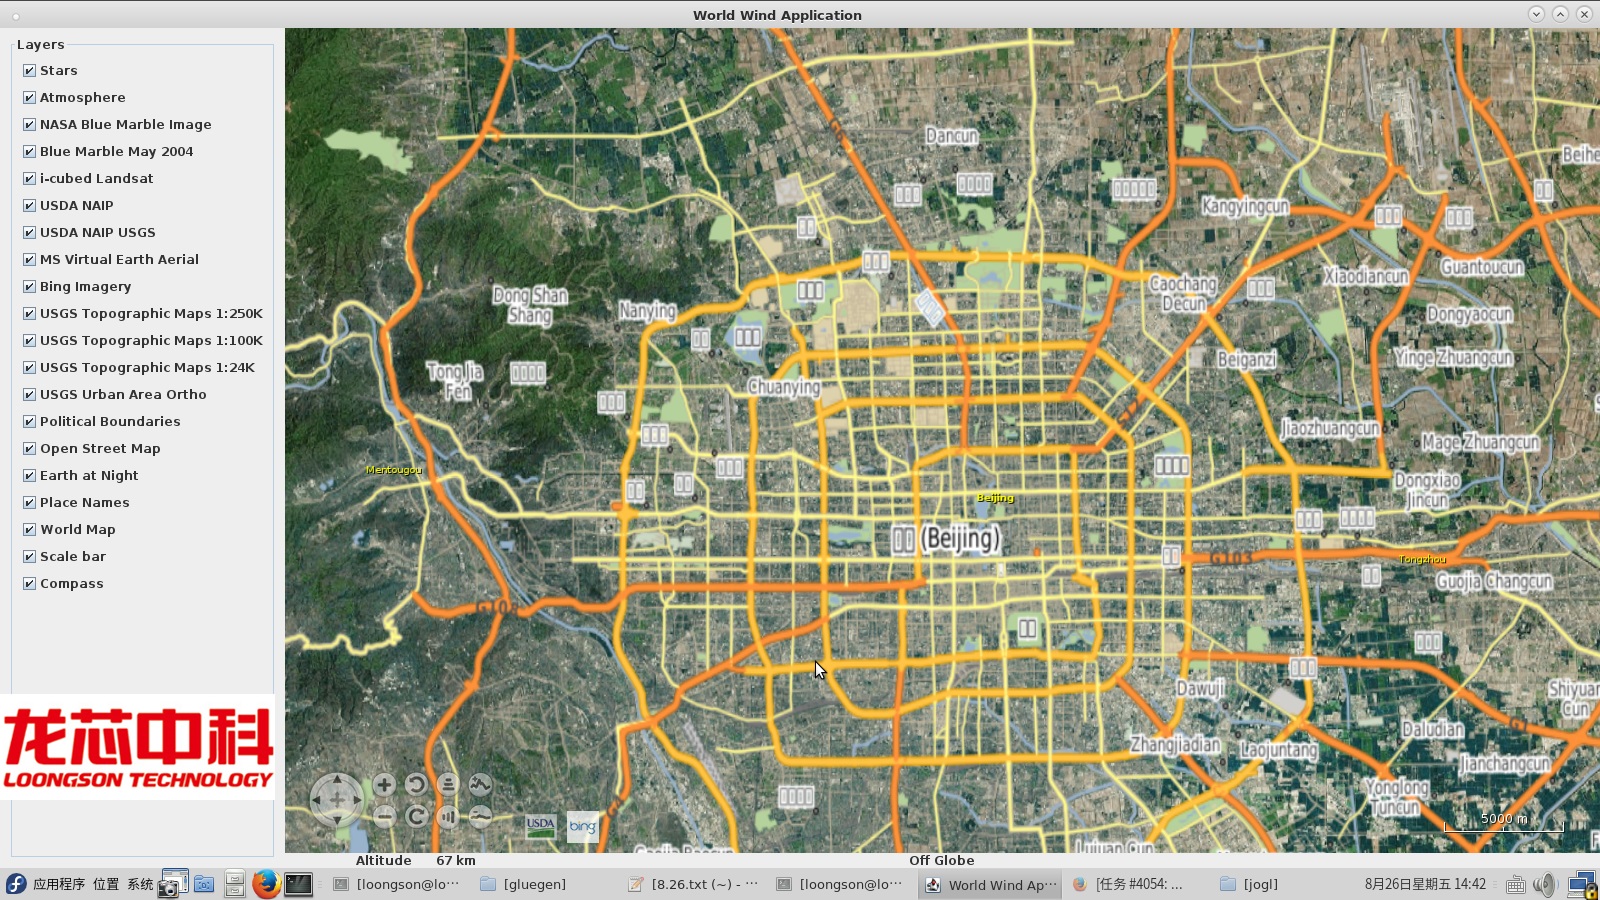
北京城市地图
龙芯公司
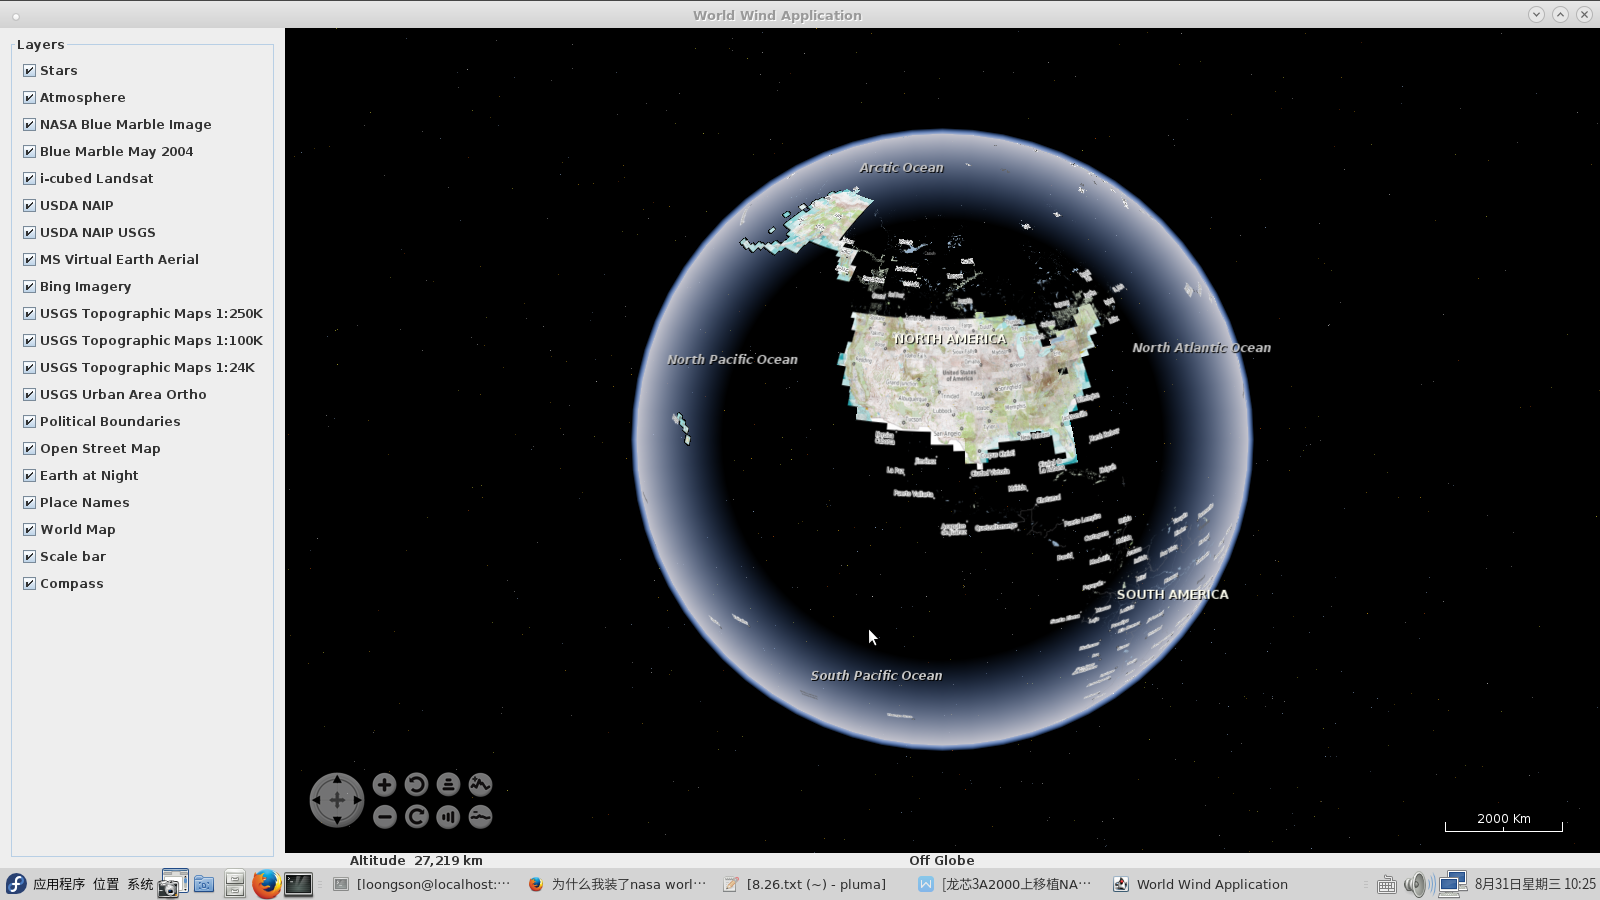
华盛顿城市路线图
worldwind官方网站上提供更多精美实例,大家一起欣赏下。

五、如果您觉得要修改的代码太多,不方便。笔者为你提供了更简单的方法。
1. 下载http://ftp.loongnix.org/others/NasaWorldWind/ 里面有patch文件,还有使用说明。根据说明来修改三个软件包,最后在worldwind目录里输入
./run-demo.bash gov.nasa.worldwindx.examples.ApplicationTemplate
 

Copyright © 2008-2022 龙芯中科技术股份有限公司 京ICP备14017781号-1京公网安备 11010802035786 号

本网站由龙芯3C5000服务器提供强劲动力